How to Program Jobs Using Scheduler
Keep up with high production volume by scheduling jobs in advance.
by Chiaki Kako, Applications Manager at Mazak Optonics Corp.

Mazak laser machines are high-powered production equipment that enable users to turn ordinary production into extraordinary.
Although Mazak offers customized automation solutions, sometimes automation is not a realistic option for companies due to budgetary concerns, lack of space, or simply because the company is “not quite there yet”.
For customers who wish to keep up their high production volume with limited resources, Scheduler is a great addition when planning a more effective production.
As the name suggests, Scheduler will store a program schedule along with the required sheet quantities and material information. The controller will keep running the schedule automatically until it finishes the batch, so users only need to worry about loading and unloading sheets.
How Does Scheduler Work?
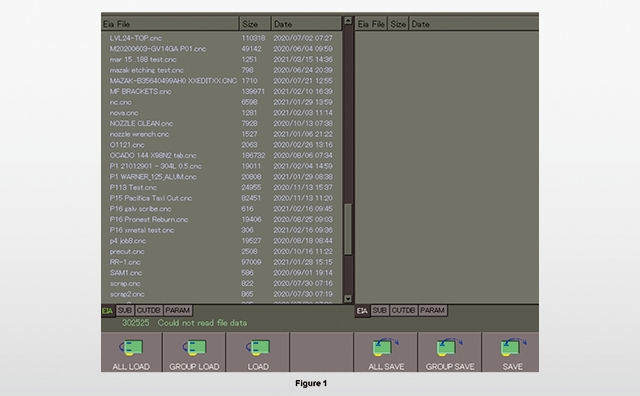
Users can load either .CNC or .DRG (for Mazak Smart System or Radan) to the NC controller.
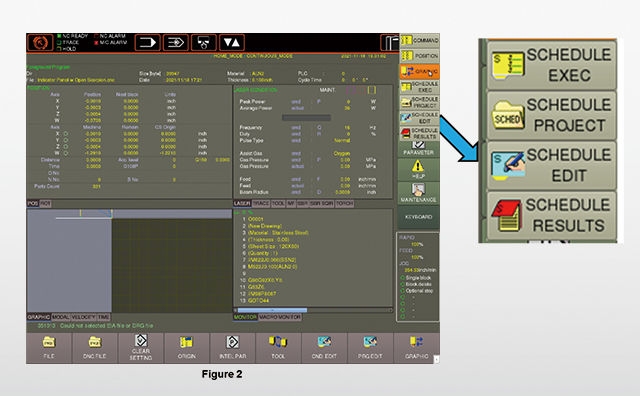
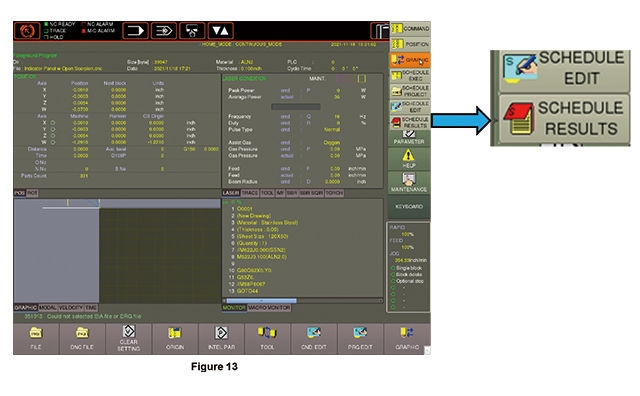
Select COMMAND , then select the SCHEDULE EDIT button.
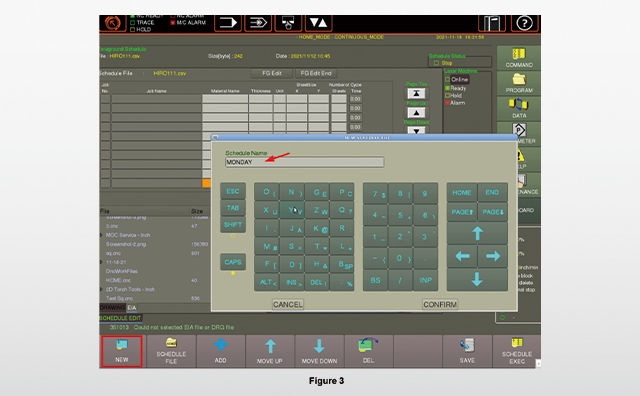
Select NEW and enter a name for the new schedule.
Users can now start adding programs to the new schedule. Highlight the file that needs to be added and press ADD.
Then, confirm the job number.
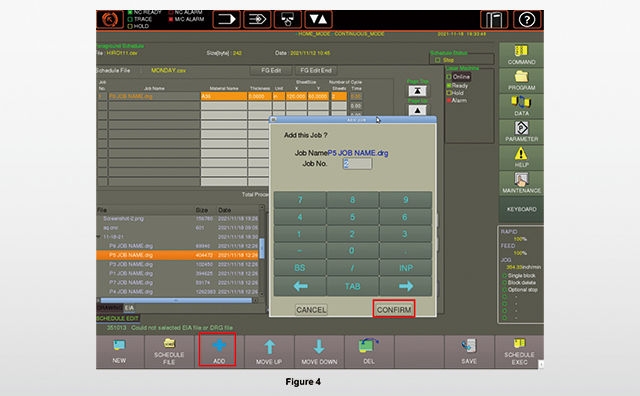
Enter the quantity of sheet and product pallet number for .DRG programs. (for .CNC programs, select material, material thickness and sheet size from the pull-down menu) and click CONFIRM.
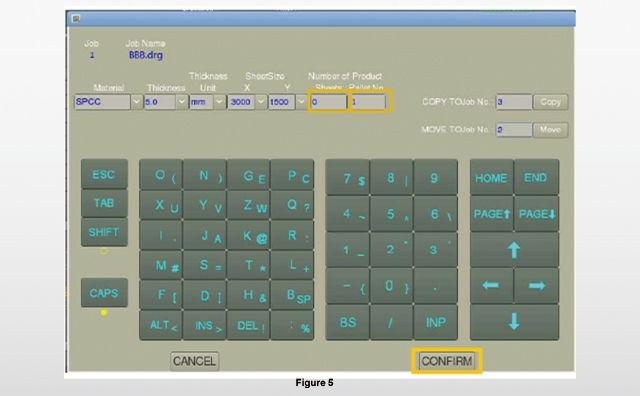
Repeat this process until the schedule is complete. Then, press SAVE . The schedule will be saved as [New File Name].CSV on the controller.
Next, go to COMMAND → SCHEDULE EXEC to start the schedule.
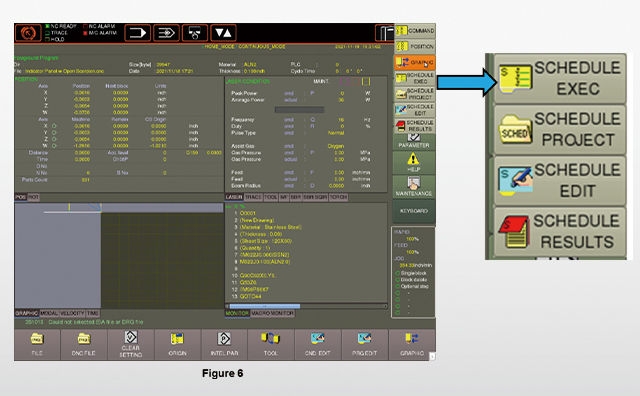
But first, switch the job mode to ONLINE.
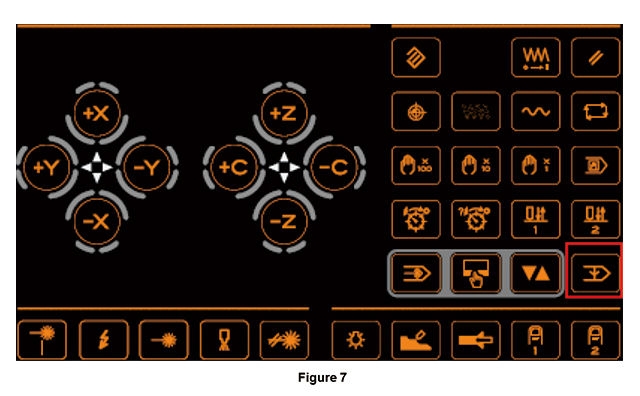
Click ONLINE from the Laser Machine status buttons to ensure it is turned on. Then press START .
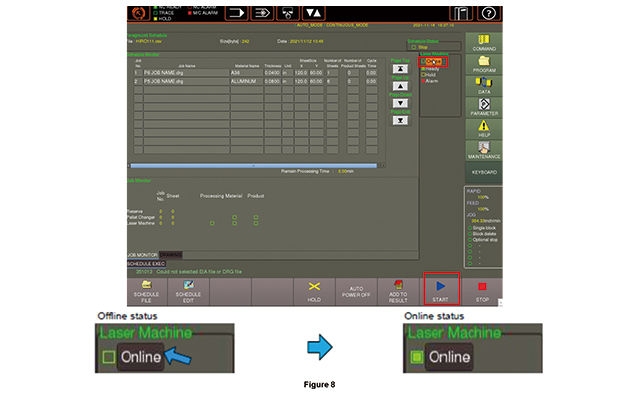
Program order and sheet counts can always be updated by going back to the sheet schedule edit screen.
Edit a Scheduled Job
Once users start a schedule, they can view the status of each program by the job indicators next to the job numbers in the SCHEDULE EXEC screen.
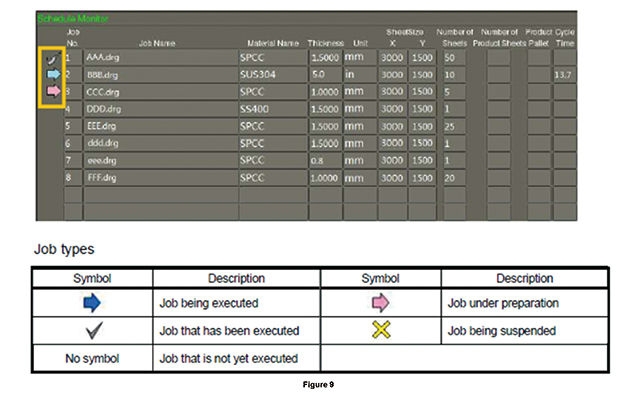
Jobs that are not in queue (blue or pink arrow) can still be edited, like orders or sheet counts.
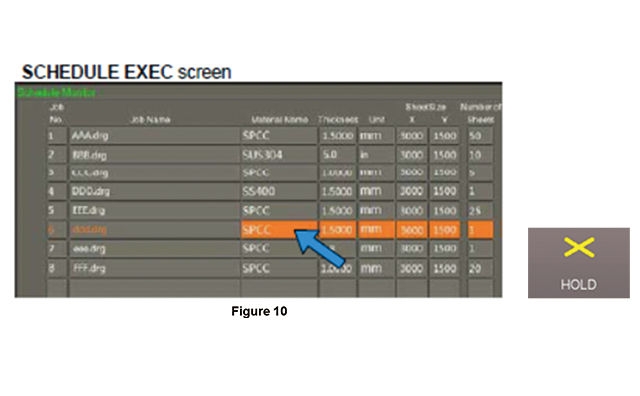
Sometimes users may need to skip a job due to missing material in the warehouse. In this case, highlight the program that needs to be skipped and select the HOLD button on the bottom of the SCHEDULE EXEC screen.
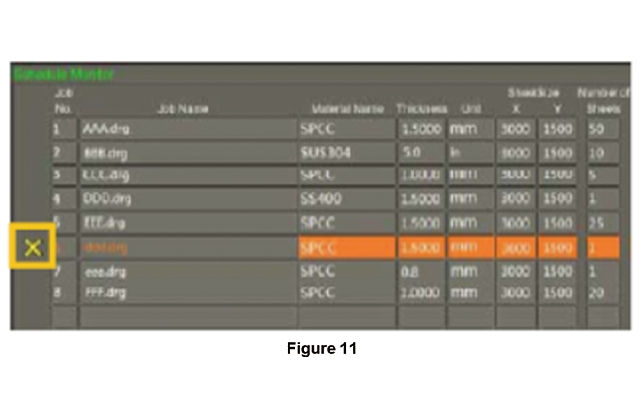
Now, a yellow X will appear next to the job number.
Cancel a Scheduled Job
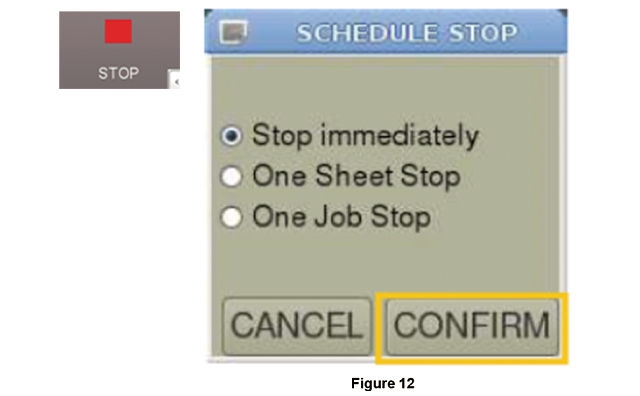
Sometimes a hot job comes along in the middle of a shift that may require users to stop a scheduled job. To do this, select the STOP button on the bottom of the SCHEDULE EXEC screen. This will provide users with additional options for stopping a scheduled job.
View Completed Schedules
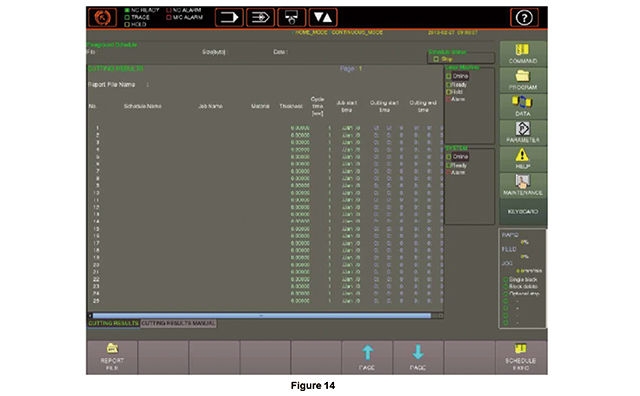
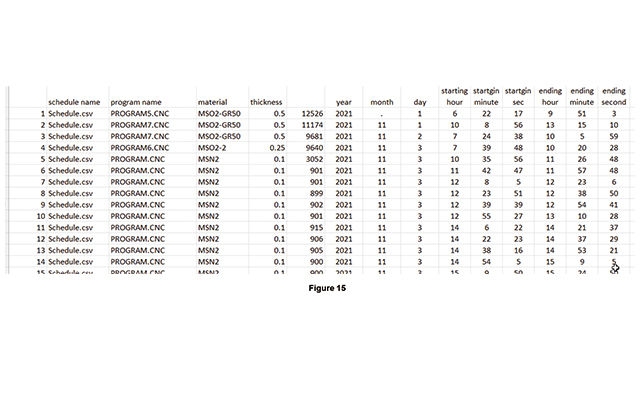
Once a scheduled job is complete, users can view the schedule result on the SCHEDULE RESULTS screen. This information is also saved in the RESULTS folder as a .CSV file in the PREVIEW DATA folder. This .CSV file can be used for MRP transactions or overall equipment effectiveness (OEE) calculations.
Safety First
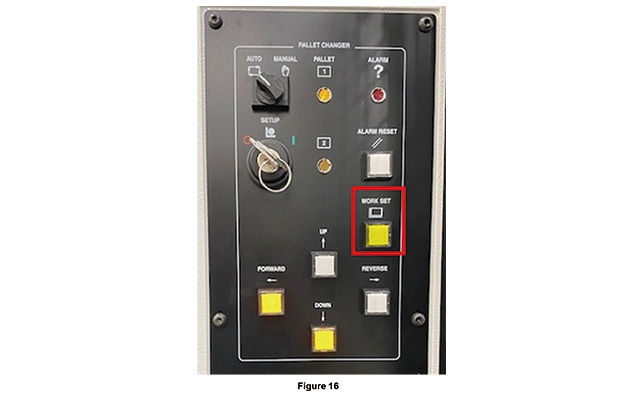
Scheduler will handle pallet changes automatically, but it is the operator’s responsibility to ensure the pallet area is clear of obstructions or workers after loading a new sheet. After confirming safety inside the laser curtains, the WORK SET button needs to be pressed on the 2PC control panel.
For additional assistance, please contact the Mazak Applications Department at 1-888-MAZAK-US.

